About Me

- Cookiez Kreationz
- PSP is my world, need I say more :) If you would like to reach me regarding my tutorials and other things then I will be glad to answer them, but please no spam emails thank you. E-mail me at cookiezkreationz@yahoo.com. I wanna thank Nikki from Killer Kitty Scraps for making my really cute blog layout, thank you hun!
Powered by Blogger.
Followers
Live Feeds
Sunday, January 26, 2014
PTU: Photo Beauty Tutorial
Xero: Porcelian
Penta: Dot and Cross
This tutorial is a little different, no scraps were used, but doesn't mean creativity is limited.
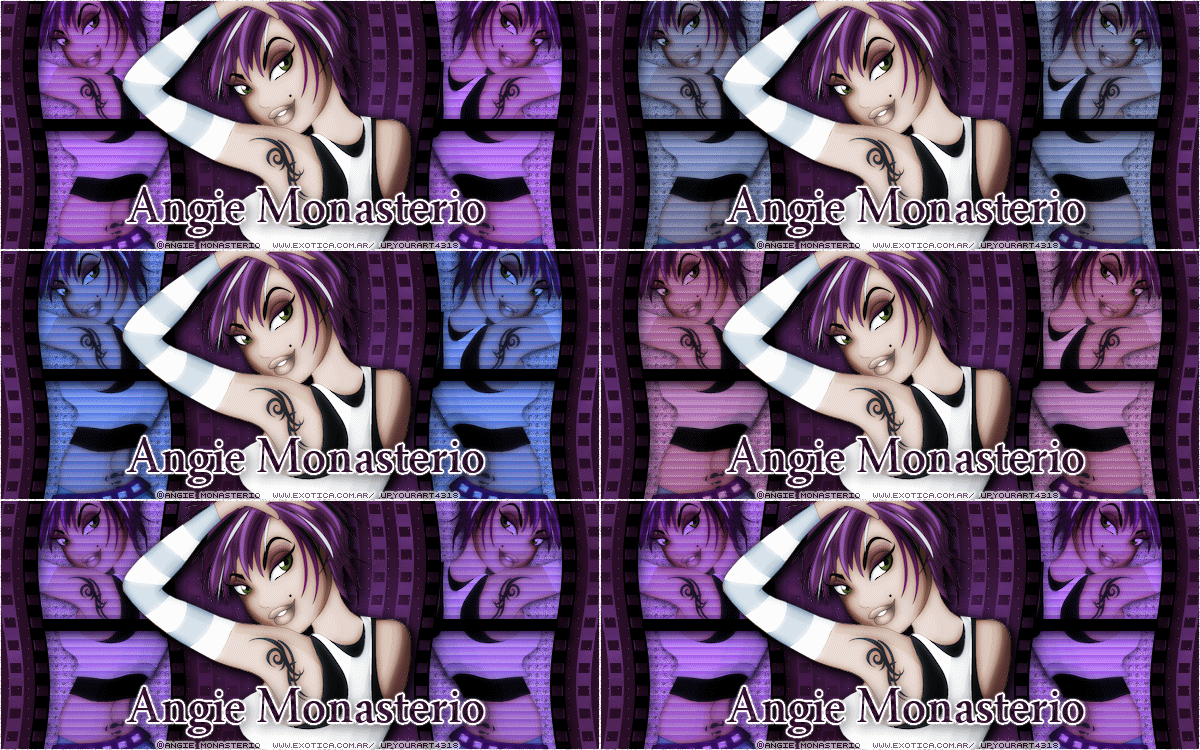
I wanted to show off Angie Monasterio art. This beauty of a tube I choosed is my favorite, she's got my favorite colors purple and blue, so of course I had to get her.
Are you ready people,
Get your Corel PSP X2 warmed up cause here we go....
Open Spawn's template 145
Everything is all together thanks to Spawn, cause he is just so helpful.
Click on the last layer of the template, hold down SHift+L, to colorize your BG.
I choose the color closer to purple.
Then when you got your color established.
go to your Effects: choose penta.com plug-in: and choose Dot and Cross.
Follow my picture tip so you know what sizes your looking for.
I did my tiny dots, but you can do large ones if you wish to.
Remember all I want is what your comfortable with.
Play with the sizes.
If not follow mine :)
After you've finished your BG layer, head to your Film Lines layer of the template.
Same steps as what I had explain earlier, we are going to colorize these film lines as well.
so pick any color you wish, I chose a lighter purple. And added a drop shadow for the film lines.
And do the same for the right and left film layers.
I also applied a porcelain effect to Angie art. And to make her pop out more I added a drop shadow.
Then center her in the middle of your banner.
Add your copyrights, and license number.
Add your name, and tada. You are finished with the non-animated version of the banner.
To ANIMATE (OPTIONAL):
-Now if you are familiar with Jasc animation Program, you can add multiple colors to the right and left film layers, like I have done. And merge them frame by frame, copy and paste them into your jasc animation program, and select the transition effects option, from there you pick FADE.-
Leave everything as is, don't adjust layers or frame, and click OK .
You should see a transitional fade effect of your multi colored layers.
And then save your animation as gif. file
Labels:
ct,
THEPSPPROJECT,
tutorial,
UYA
Subscribe to:
Post Comments (Atom)
Pageviews
Popular Posts
-
Taking a second look at Zombies, apparently there's a zombie frenzy out there, but who says you can't look smokin' hot while y...
-
Wanted to share a few masks I made, hope you ladies like em :) Click HERE to download Happy tagging!
-
Love Karra's latest kit creation, certainly not ready for fall yet are we? Check out "Coronach" packed with gorgeous reds a...
-
Scrapkit by KillerKitty You can find her awesome PTU: Punkilicious Neon Kit at her store HERE Font Billy Argel Filters used: Xe...
-
I wanted to show off an Artist that specifically captured the scariness of undead feens and Corlen Scope only found at Thepspproject has...
-
"Alena Mystical Forest" PTU Art by Alena Lazareva Enjoy my tutorial :) You must have working knowledge of Corel...
-
It's October time, guess what I love Halloween, let's kick off October with a Halloween tag. Oh and this week 1st of every month, ...
-
Feeling the need for a cute Steampunk kit? Check out Irish Princess Designs latest creation, packed with 60 rad, vintage elements, and 10 ...
Labels
- © Barbara Jensen (1)
- © Tatjana Art (1)
- ©Alena Lazareva (1)
- ©Angela Newman (2)
- ©Anna (2)
- ©Camilla Drakenborg (1)
- ©Cris Delara (2)
- ©Cute Loot (1)
- ©ELIAS (6)
- ©gIO (1)
- ©Ismael Rac (4)
- ©Keith Garvey (8)
- ©Keith Selle (1)
- ©KiwiFireStorm (2)
- ©Pinuptoons (6)
- ©Renne (1)
- ©Verymany (2)
- ©Victoria Fox (1)
- ©Vinegar (1)
- ©Zindy (2)
- ©Zlata M (1)
- A Taggers Scrap (1)
- CDO (19)
- Clusters (10)
- ct (85)
- Designer Scraps (16)
- FB Timeline (1)
- freebie (9)
- FTU (16)
- Halloween (1)
- heart (1)
- Irish Princess Designs (10)
- Karra's Kreative Corner (2)
- Karra's Kreative Korner (7)
- Killer Kitty Scraps (3)
- Krissy's Scraps (3)
- Mask (3)
- Misfits (1)
- PFD (8)
- ptu (47)
- QP (1)
- Rissa Design's (1)
- Snaggies (7)
- Snags (6)
- Soxsational Scraps (4)
- tags (24)
- Tasha's Playground (2)
- template (2)
- THEPSPPROJECT (23)
- TPP (20)
- tutorial (58)
- Upyourart (2)
- UYA (8)
- Wicked Princess Scraps (19)
- wordart (1)


0 comments:
Post a Comment