About Me

- Cookiez Kreationz
- PSP is my world, need I say more :) If you would like to reach me regarding my tutorials and other things then I will be glad to answer them, but please no spam emails thank you. E-mail me at cookiezkreationz@yahoo.com. I wanna thank Nikki from Killer Kitty Scraps for making my really cute blog layout, thank you hun!
Powered by Blogger.
Followers
Live Feeds
Thursday, October 18, 2012
PTU: Sweet Sassy-Tutorial
Artist by: ©Anna Liwanag
PTU: Sweet Sassy Of Mine
WickedPrincess Scraps Blog site HERE
Font: Nelly Script Flourish
Plug-ins : Xero-Porcelain, Alien skin Xenofex2-Little Fluffy Clouds
Font: Nelly Script Flourish
Plug-ins : Xero-Porcelain, Alien skin Xenofex2-Little Fluffy Clouds
Open a new Canvas make sure the sizes are 700x700, with a 72.000 resolution.
From your kit open WP_SWS_PP1 and WP_SWS_PP10 re-size both papers to 700 x 700 , copy and paste them into your canvas. You are going to make both these papers into your mask layers, but make sure you set WP_SWS_PP10 layer property to soft light.
Next step: Head to your layers tab-->Load/Save Mask-->Load Mask from Disc
From there there choose any mask you want or choose the one i used, preferably a squarish shaped mask.
And click Load.
Now you want to Merge group
So move your mouse over your layer and right click your layer
Look for Merge--> merge group.
Tada you have a masked layer.
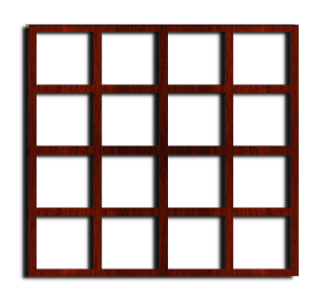
i have included a window frame I have made right here, just right click and save it.
But please do not claim it as your own or alter it.

Now take your Selections Tool, the one that looks like a dotted square / circle / magic wand
Next click on your mask layer, your top mask layer.
Open a new layer and make a box the size of my window, what your going to do next is your going to make this rectangle into sky clouds, using your Alien skin xenofex2 plug-in and choose Little Fluffy Clouds effect, use the default settings, and click OK.
And now you can deselect.
Now you should have a clouds under your window.
Now open WP_SWS_FLOWER7 from your kit , re-size it to 30%, copy and paste it into your canvas under your window frame, like how I have mine, and add your drop shadow to your flowers.
Open WP_SWS_CURTAIN re-size to 92%, copy and paste it into your canvas, over your window frame, and add your drop shadow.
Open WP_SWS_BOXTRIO re-size to 40% and paste into your canvas over your window frame, and add your drop shadow.
Open WP_SWS_CHAIR re-size to 90% and paste into your canvas over your window frame and curtain, and add your drop shadow.
Open WP_SWS_TABLE re-size to 65% and paste into your canvas over your window frame, and add your drop shadow.
Open WP_SWS_LAMP re-size to 30% and paste into your canvas over your WP_SWS_TABLE, and add your drop shadow.
Open WP_SWS_CELLO re-size to 30% and paste into your canvas over your WP_SWS_TABLE, on its pull out chair, using your move tool adjust the angle of your WP_SWS_CELLO, once you like how its placed, add your drop shadow.
Open WP_SWS_MASCARA re-size to 10% and paste into your canvas on top of your WP_SWS_TABLE, and add your drop shadow.
At this point you can add pretty much any little trinket you like on your table, to your hearts content. I added WP_SWS_FLOWER4 flowers, just because I like them, but it is all up to you.
Open WP_SWS_TABLE2 re-size to 40% and paste into your canvas next to your WP_SWS_CHAIR, and add your drop shadow.
Now open your furry feline WP_SWS_CAT2, re-size to 20% and paste into your canvas next to your WP_SWS_CHAIR, and add your drop shadow, and place that little fella under WP_SWS_TABLE2.
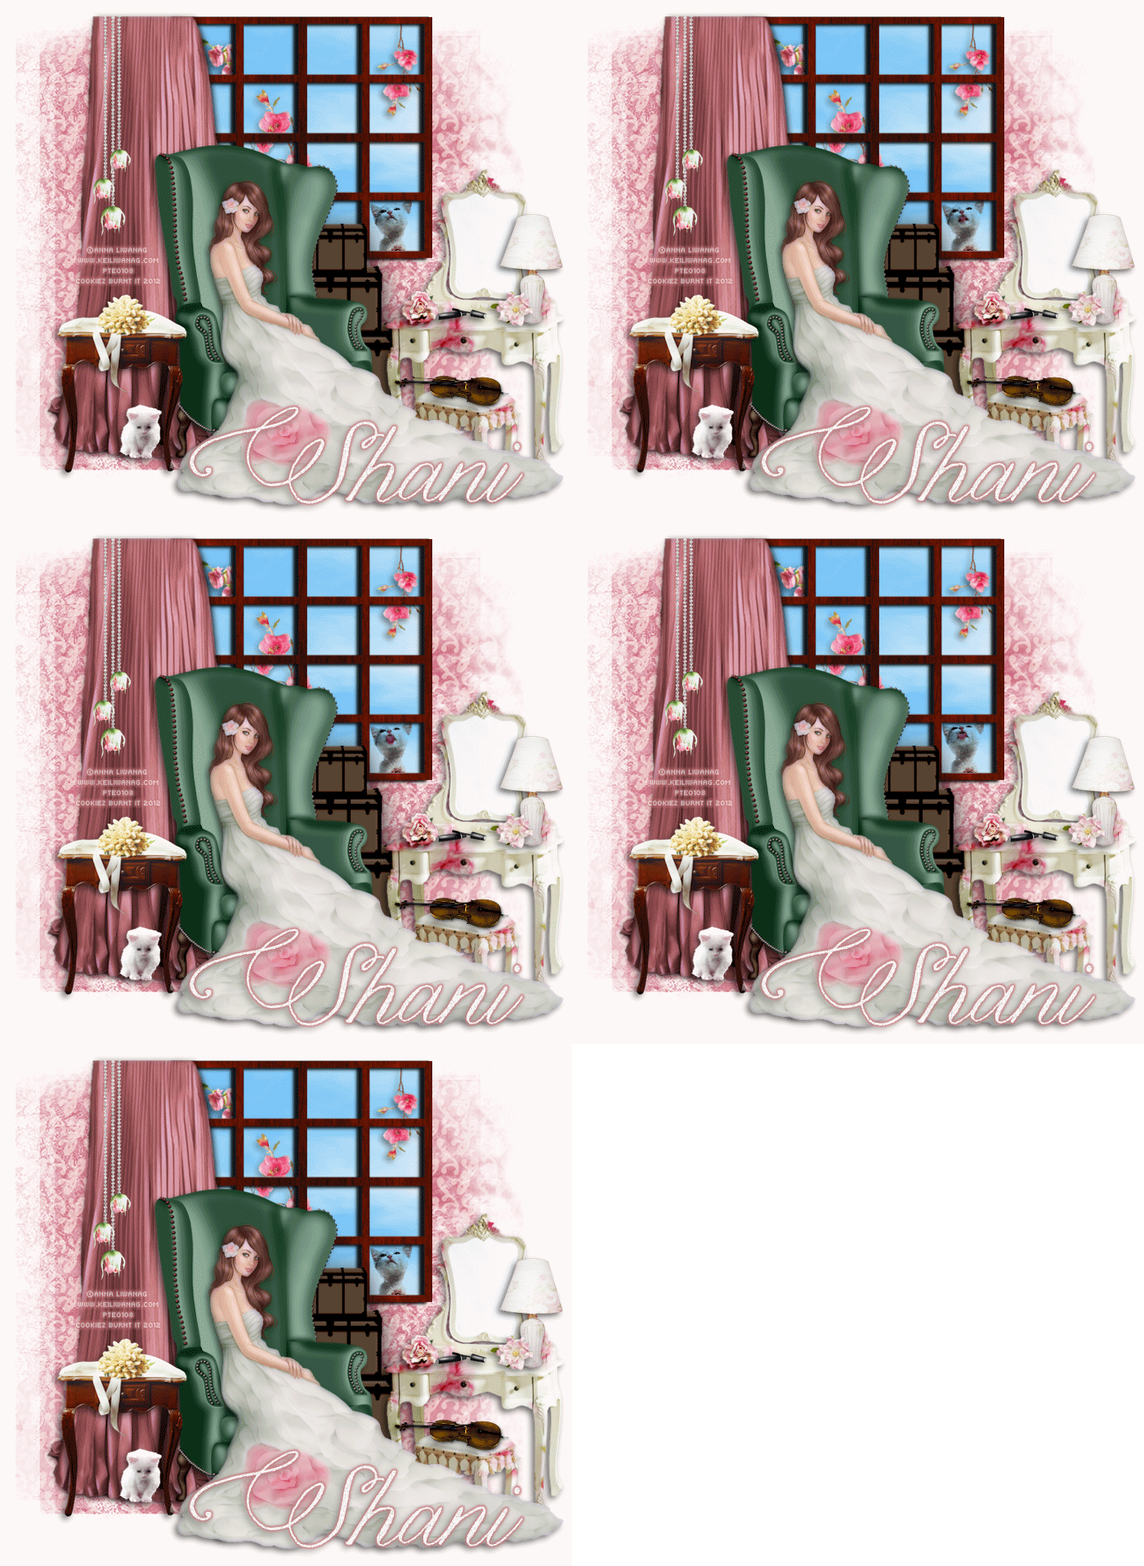
Sighs still with me? Now grab your tube, preferably one that's sitting down in a long flowy dress, if you like mine you can purchase her at Creative Design Outlet store.
Apply your xero---> porcelain effect to your tube and sit her down into the chair like how I did mine.
Next make sure you place your copyrights of your tube and your license.
Add your name, and your done.
Labels:
©Anna,
CDO,
ct,
ptu,
tutorial,
Wicked Princess Scraps
|
1 comments
PTU: Rock'n Pink
In the mood for a rock'n pinkish kit?
Well search no more Lexi of Lexi
Creationz Scrapz,
has created a hawt pink Gimme A Beat kit you must have
for your rocking tubes.
Artist By ©Verymany
Gimme A Beat kit available for purchase at Designer Scraps Today!
Please stop on by you won't be disappointed!
Here's a few snags to share with you,
just right click to view full size, then save to your computer.
Please do not claim these snags as your own or alter my tag in anyway,
that includes adding names to them.
Thanks and enjoy!
Thanks and enjoy!
Labels:
©Verymany,
ct,
Designer Scraps,
PFD,
Snags
|
0
comments
Wednesday, October 3, 2012
PTU: Puppy Love Freebie
Artist By ©Maryline
Puppy Love kit available for purchase at Designer Scraps Today!
Please stop on by you won't be disappointed!
Below I have made a Facebook Timeline Snag
your welcome to use and add your own photos of your furry pup pals.
Click on image and save to your desktop, its jsut that easy peasy
Enjoy!
Labels:
CDO,
ct,
Designer Scraps,
FTU,
ptu,
Snaggies
|
0
comments
Subscribe to:
Posts (Atom)
Pageviews
Popular Posts
-
Wanted to share a few masks I made, hope you ladies like em :) Click HERE to download Happy tagging!
-
Taking a second look at Zombies, apparently there's a zombie frenzy out there, but who says you can't look smokin' hot while y...
-
I wanted to show off an Artist that specifically captured the scariness of undead feens and Corlen Scope only found at Thepspproject has...
-
Love Karra's latest kit creation, certainly not ready for fall yet are we? Check out "Coronach" packed with gorgeous reds a...
-
Scrapkit by KillerKitty You can find her awesome PTU: Punkilicious Neon Kit at her store HERE Font Billy Argel Filters used: Xe...
-
Feeling the need for a cute Steampunk kit? Check out Irish Princess Designs latest creation, packed with 60 rad, vintage elements, and 10 ...
-
Available for download at Siggy Showdown Blog HERE or yu can grab the PSP version here
-
It's October time, guess what I love Halloween, let's kick off October with a Halloween tag. Oh and this week 1st of every month, ...
Labels
- © Barbara Jensen (1)
- © Tatjana Art (1)
- ©Alena Lazareva (1)
- ©Angela Newman (2)
- ©Anna (2)
- ©Camilla Drakenborg (1)
- ©Cris Delara (2)
- ©Cute Loot (1)
- ©ELIAS (6)
- ©gIO (1)
- ©Ismael Rac (4)
- ©Keith Garvey (8)
- ©Keith Selle (1)
- ©KiwiFireStorm (2)
- ©Pinuptoons (6)
- ©Renne (1)
- ©Verymany (2)
- ©Victoria Fox (1)
- ©Vinegar (1)
- ©Zindy (2)
- ©Zlata M (1)
- A Taggers Scrap (1)
- CDO (19)
- Clusters (10)
- ct (85)
- Designer Scraps (16)
- FB Timeline (1)
- freebie (9)
- FTU (16)
- Halloween (1)
- heart (1)
- Irish Princess Designs (10)
- Karra's Kreative Corner (2)
- Karra's Kreative Korner (7)
- Killer Kitty Scraps (3)
- Krissy's Scraps (3)
- Mask (3)
- Misfits (1)
- PFD (8)
- ptu (47)
- QP (1)
- Rissa Design's (1)
- Snaggies (7)
- Snags (6)
- Soxsational Scraps (4)
- tags (24)
- Tasha's Playground (2)
- template (2)
- THEPSPPROJECT (23)
- TPP (20)
- tutorial (58)
- Upyourart (2)
- UYA (8)
- Wicked Princess Scraps (19)
- wordart (1)


